Advanced Prompting
Advanced techniques for complex and high-resolution images
Fine-tuning the Negative Prompt
A well-structured negative prompt is crucial for high-quality images. With targeted negative prompts, you can avoid common problems:
Quality Issues
blurry, low quality, pixelated, jpeg artifacts, compression artifacts, bad composition, deformed, mutated, signature, watermark
Anatomy Issues
bad anatomy, deformed hands, extra fingers, missing fingers, extra limbs, distorted face, unrealistic proportions, cross-eyed, assymetrical, disfigured
Unwanted Art Style
cartoon style, anime, 3d render, painting, drawing, sketch, illustration, low detail face
Impact of the Negative Prompt
Negative Prompt:
Empty
Negative Prompt:
bad quality, blurry, bad anatomy, worst quality, low quality, lowres, extra fingers, ...
Tips for effective negative prompts:
- Adapt project-specifically: Focus on anatomy errors for portraits, quality issues for landscapes
- Don't overload: Extremely long negative prompts can confuse the model
- Test run: Compare results with and without the negative prompt
- Prioritize: Place the most important avoidance terms at the beginning of the negative prompt
Multi-Prompt / Composable Diffusion
Multi-prompt or Composable Diffusion is an advanced technique that allows using multiple separate prompts simultaneously to generate complex scenes.
How it works:
1. Prompt Decomposition
Break down your complex scene into individual elements and create separate prompts for each element.
2. Weighted Combination
Assign a weight to each prompt indicating its importance in the overall composition.
3. Connection
Connect the prompts using specific syntax depending on the UI used.
Example: Landscape with multiple elements
a majestic castle on top of a hill
a beautiful lake with reflections
sunset, cinematic lighting, detailed, 8k
Implementation Syntax:
A1111 WebUI:
a majestic castle on top of a hill :1.2 AND a beautiful lake with reflections :0.8, sunset, cinematic lighting, detailed, 8kComfyUI:
// Connected in separate prompt nodes with corresponding weightsThis technique is particularly useful for:
- Complex scenes with multiple main elements
- Combining different styles
- Precise control over the balance of elements in the image
Hires-Fix & Upscale Loops
For high-resolution images with fine details, special techniques are necessary, as diffusion models often struggle at higher resolutions.
Hires-Fix
This technique first generates an image at low resolution and then refines it in a second pass:
Initial Generation
Generate image at low resolution (e.g., 512x512 px)
Upscaling
Enlarge image to target size (e.g., 1024x1024 px)
Detail Refinement
Rediffusion with fewer steps for detail enhancement
Typical Settings:
Lower values = retain more of the original
Different upscalers have different style impacts
Fewer than in the initial generation
Upscale Loops / Progressive Growing
For particularly large images (2K+), a multi-stage process can work better:
512×512
Initial Generation
768×768
First Upscale + Fix
(Denoising: 0.5)
1024×1024
Second Upscale + Fix
(Denoising: 0.4)
1536×1536+
Final Upscale + Fix
(Denoising: 0.3)
Advantages of this method:
- Retains overall composition and important elements
- Adds finer details at each step
- Avoids artifacts and inconsistencies at very high resolutions
- Allows more control over the level of detail in each step
ControlNet & LoRAs: How they work
ControlNet
ControlNet allows you to guide the generation process using an input image. Instead of just working with text, the model can consider outlines, poses, depth maps, or other structural information.
Main Applications:
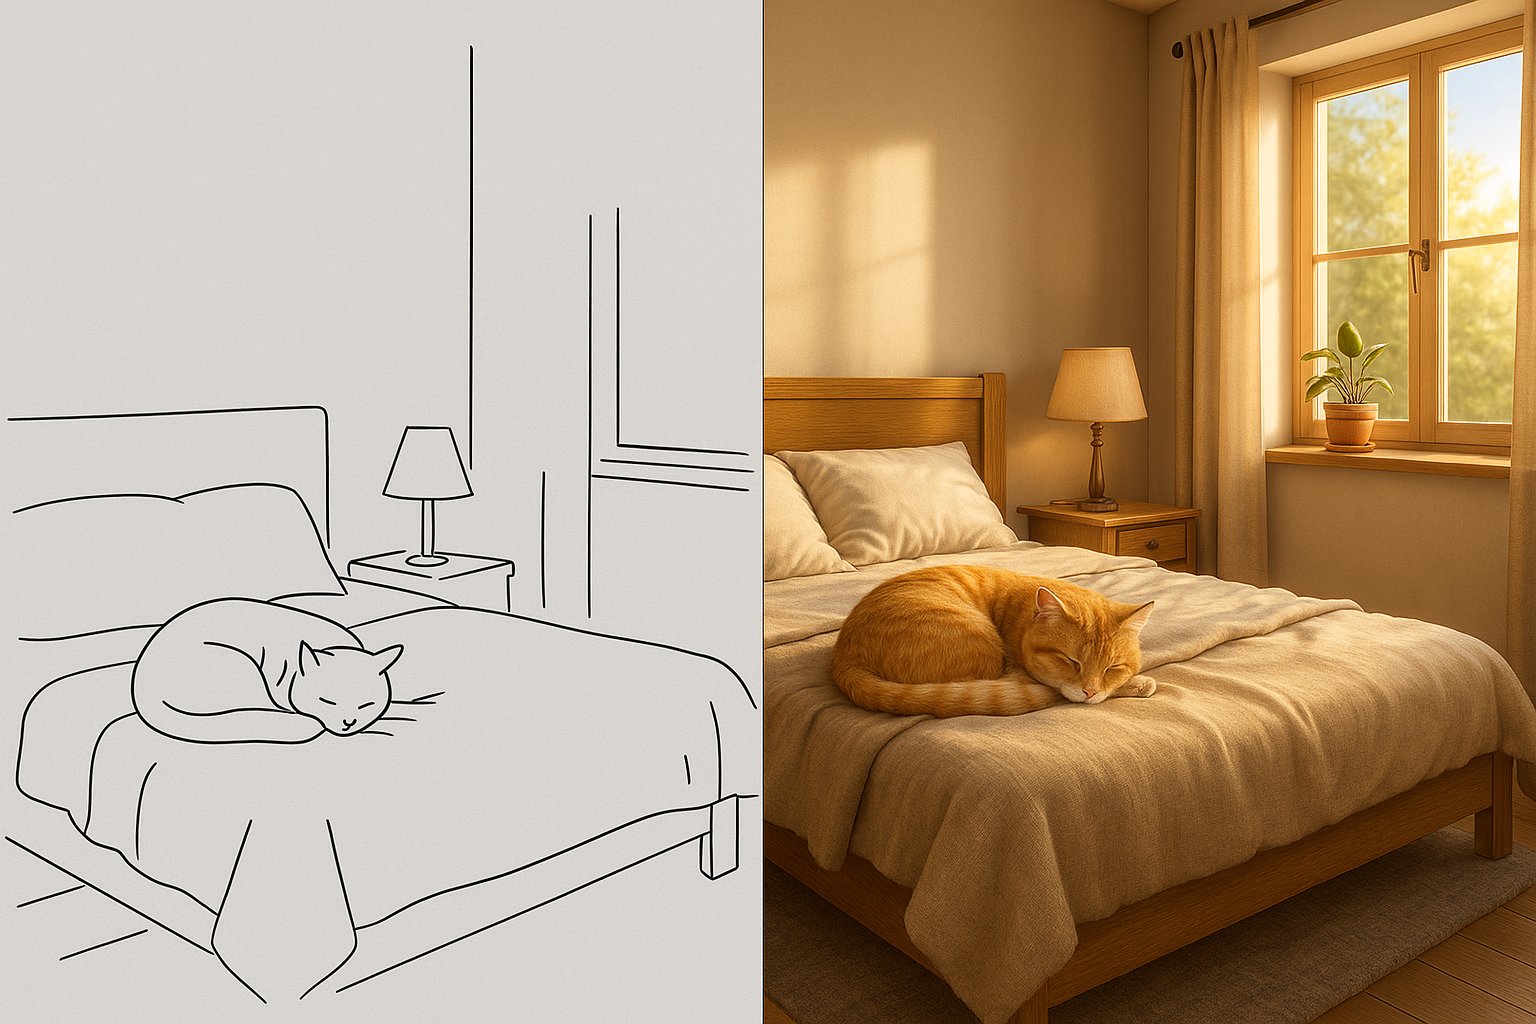
- Canny/Scribble: Convert outlines and sketches into finished images
- Pose: Control body postures and gestures
- Depth/Normal: Maintain 3D information and spatial structure
LoRAs (Low-Rank Adaptations)
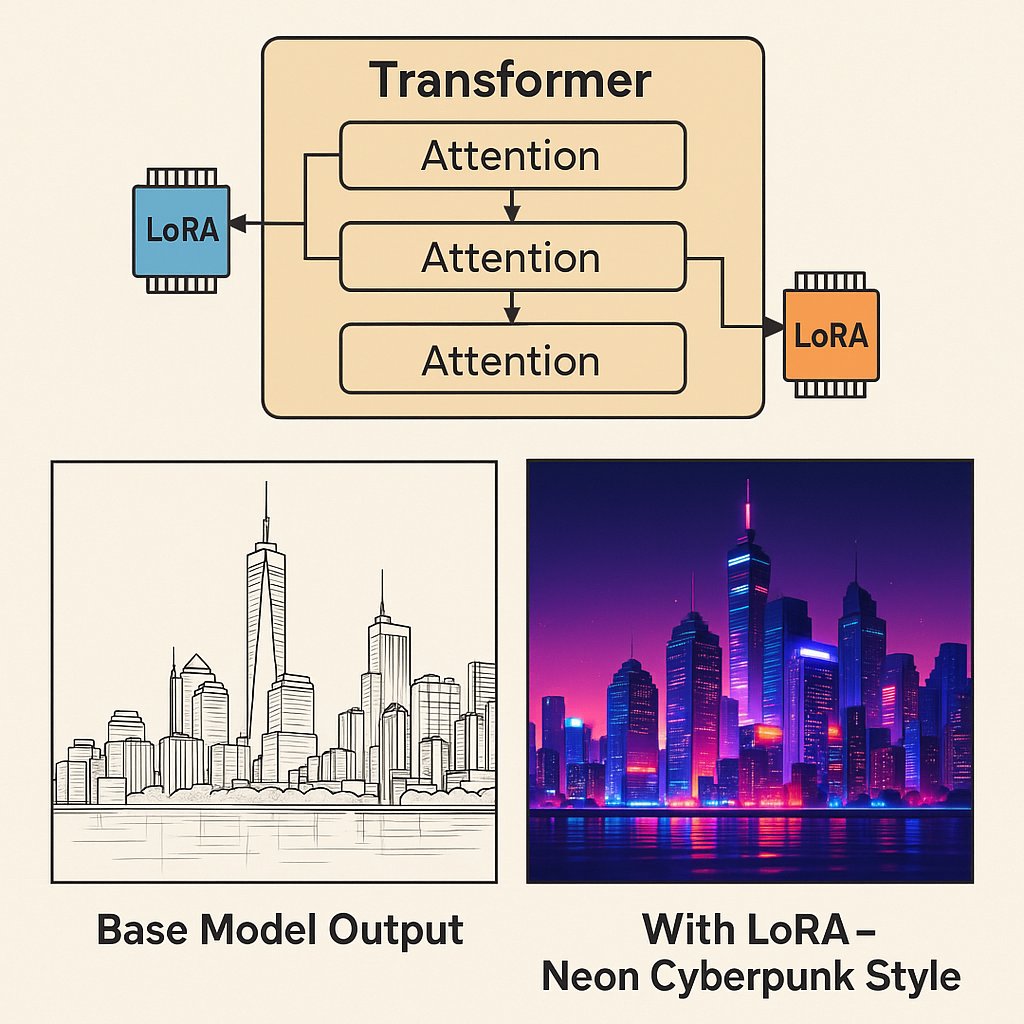
LoRAs are small, trained model add-ons that teach a base model new styles, characters, or concepts without needing to retrain the entire model.
Main Applications:
- Styles: Specific art styles or visual aesthetics
- Characters: Consistent generation of specific people or figures
- Concepts: Special objects or visual elements
Integration into the Workflow
Both technologies can be combined with the prompting techniques learned so far:
1. Create Base Prompt
Define the main subject and style as usual
2. Add ControlNet / LoRAs
Select appropriate control inputs and model extensions
3. Adjust Weights
Find the balance between text prompt and other inputs
4. Refine Iteratively
Find the optimal settings through testing
Further Tutorials:
These topics are complex and are covered in separate, specialized tutorials:
Summary
You now have a comprehensive overview of advanced prompting techniques:
- Use Negative Prompts specifically and tailor them to the use case
- Create complex scenes with multiple elements using Multi-Prompt Techniques
- Utilize Hires-Fix and Upscale Loops for high-resolution, detailed images
- Understand the basic concepts of ControlNet and LoRAs and integrate them into the workflow
Course Completion:
Congratulations! You have completed all tutorial modules and now have a solid foundation of knowledge about Stable Diffusion and advanced prompting techniques.